SAML 2.0
SAML 2.0 is a security protocol for authenticating centrally managed users in multiple distributed applications without exposing their credentials to either application.
Prerequisites
This protocol depends on a remotely set up identity provider (IdP). This tutorial is illustrating how to enable a Hitchy-based application to support authentication against such an IdP via SAML 2.0. Setting up an IdP is beyond its scope, though.
There are plenty of solutions available for running your own IdP. There are multiple options including commercial and open-source software. Keycloak and authentik are examples for the latter. See our rough step-by-step tutorial for setting up Keycloak on a server using a stack of Docker containers. This tutorial is based on Keycloak.
Create custom strategy
This plugin relies on passport.js which in turn supports so called strategies to support different kinds of authentication services and security protocols. The strategy used in this example is included with 3rd-party package passport-saml which you need to install in context of your application:
npm i passport-saml@hitchy/plugin-auth is picking up all strategies configured in its runtime configuration on application start. It includes a factory service offering methods for generating strategies from a set of configuration options. That's what we use here.
Open file config/auth.js of your project and add the saml property to the list of strategies as illustrated in this example:
export default async function() {
	const { service } = this;

	return {
		auth: {
			strategies: {
				saml: await service.AuthenticationStrategies.generateSaml( "saml", {
					// URL of IdP receiving SAML requests
					entryPoint: "https://idp.cepharum.de/auth/realms/hitchy-plugin-auth-ci-test/protocol/saml",

					// name of this client as registered with the IdP
					issuer: "ci-saml-test",

					// signature algorithm to use (set to prevent insecure
					// SHA-1 used by default)
					signatureAlgorithm: "sha256",

					// URL for redirecting user to after successful login
					callbackUrl: "http://localhost:3000/api/auth/login/saml",

					// URL of local application's endpoint for logging
					// out to be exposed as meta of this service provider
					logoutCallbackUrl: "http://localhost:3000/api/auth/logout",

					// public certificate of IdP's realm used for signing
					// SAML responses
					cert: "MIICwzCCAasCfB5l4jANBg...SDuuWWgsPnlrNpCnOnM6ycT/PCDyad",
				} ),
			},
		}
	};
}
Multiple strategies?
It's fine to have multiple strategies of different name being set up like that. Just make sure name of property is different, URL-safe and provided as first argument to the generator method.
The strategy in this example is named saml. Thus, the same name is given as first argument to the generator function, too. Its second argument provides configuration options for used to set up the strategy in detail.
Adapt to your IdP
The configuration in code example is for illustration, only. You need to adapt the settings to work with your IdP.
The entryPoint URL https://idp.example.com/auth/realms/app-users/protocol/saml is your IdP's URL for the realm of users meant to gain access to your application. In Keycloak this is called Master SAML Processing URL.
The issuer
ci-saml-testis the name of your application as registered with your IdP. In Keycloak that's the name of a registered client.The signatureAlgorithm must be changed due to
passport-samlis defaulting to the more insecuresha1otherwise.The certificate - it's been significantly shortened in example above - is provided by your IdP for validating its signatures. It is required by
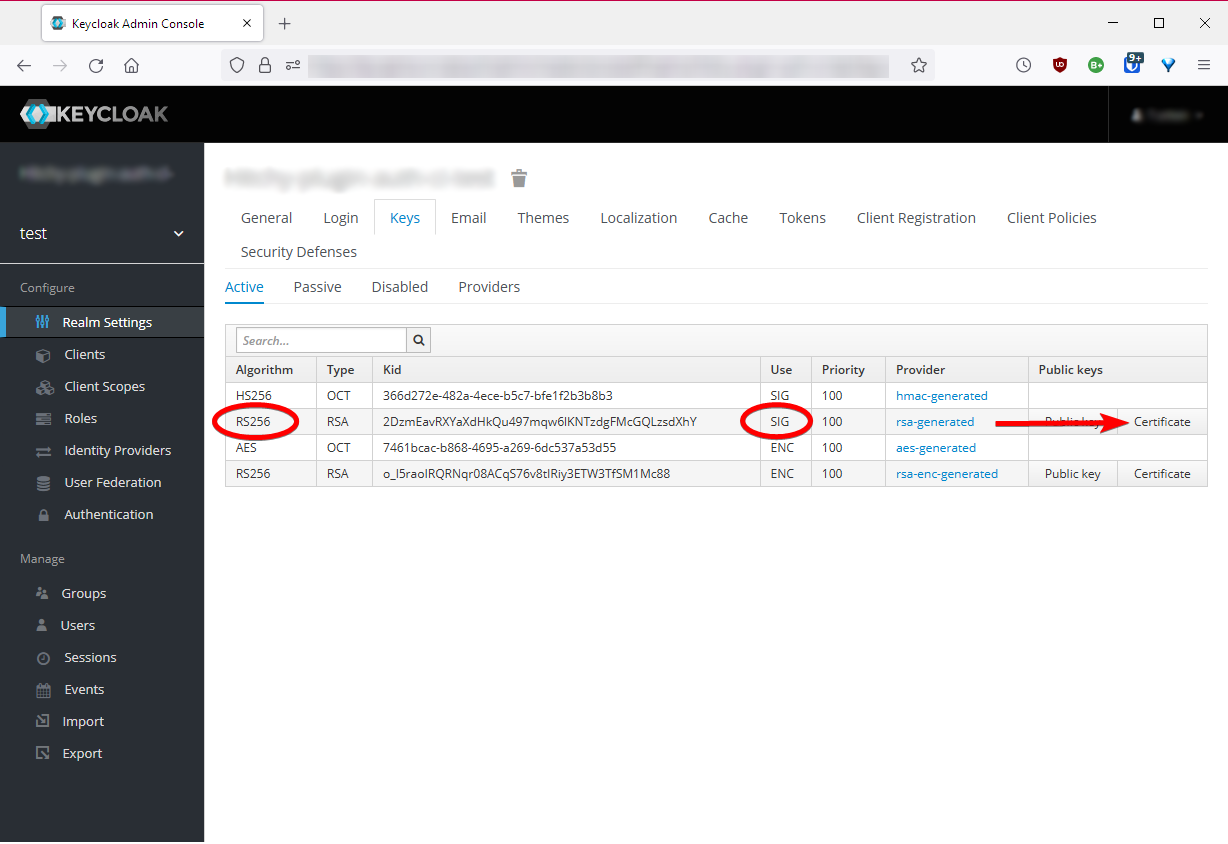
passport-samlto validate signatures on responses provided by IdP.In Keycloak the certificate to be used is found in your realm's settings, in tab Keys:
The callbackUrl https://localhost:3000/api/auth/login/saml is your application's absolute URL processing login requests returning from IdP via redirecting the user's browser after successful authentication. The path should be addressing the same endpoint triggering the authentication, thus it should be very similar to the example. It works due to routing defaults.
No matter your eventual redirect URI, you have to configure it as a valid redirect URI at your IdP.
According to that, the logoutCallbackUrl https://localhost:3000/api/auth/logout is your application's absolute URL processing logout requests after returning from IdP via redirecting the user's browser. Just like before, the path should be addressing the same endpoint triggering the logout. Do not forget to declare it a valid redirect URI at your IdP, too.
Restart and test
Restart your hitchy instance. Open browser at https://localhot:3000/api/auth/current and get a response like this one:
{"success":true,"authenticated":false}The request has succeeded, but no user is authenticated currently.
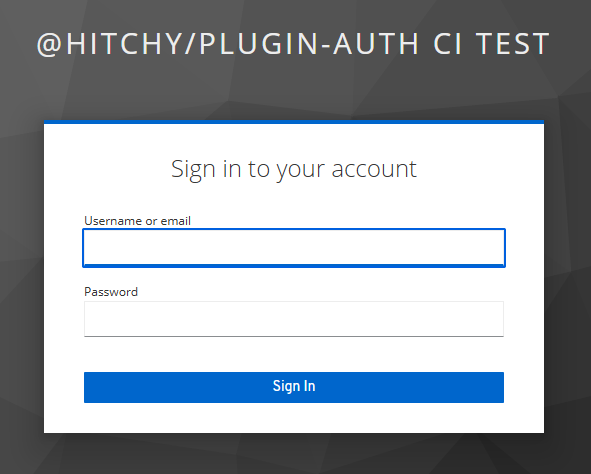
Trigger authentication by opening URL https://localhost:3000/api/auth/login/saml next. Last segment in this URL is referring to the strategy name you've picked when integrating it with the list of configured strategies.
This will redirect the browser to your IdP for prompting to log in:
After logging in there, your browser is instantly redirected back to the URL https://localhost:3000/api/auth/login/saml as given in configuration above. This time it is succeeding with a response:
{"success":true,"authenticated":true}You are authenticated!
Return to the first URL requested above. It's providing a different set of information this time:
{"success":true,"authenticated":{"uuid":"d778afae-1234-4a58-a254-b56b1f36e914","name":"your-user","roles":[]}}Try repeating this request if you like. Unless closing your browser, you stay authenticated.
If you happen to close the browser, just return to the login URL and - based on your IdP configuration - you will be re-authenticated instantly without being prompted for entering username and password again.
Next send a request to https://localhost:3000/api/auth/logout. It gets approved:
{"success":true}Fetch current state of authentication at https://localhost:3000/api/auth/current once again.
{"success":true,"authenticated":false}Try to re-authenticate instantly at https://localhost:3000/api/auth/login/saml. It's going to prompt for username and password at your IdP again.
How to welcome users?
Well, if you do not want your application's users to see the approval of logging in as raw JSON data, you simply have to replace the controller for route GET /api/auth/login/saml and make it provide any other response, e.g. some redirection to a welcome page of your application.
Adjust your application's file config/routes.js accordingly:
export const routes = {
    "GET /api/auth/login/saml": ( _, res ) => res.redirect( 301, "/welcome" ),
};
This is possible in a custom policy processed after this plugin's policy, either. This could be your config/policies.js file:
export const policies = {
    "GET /api/auth/login/saml"( req, res, next ) {
        if ( req.user ) {
            res.redirect( 301, "/welcome" );
        } else {
            next();
        }
    },
};